Up to date
This page is up to date for Godot 4.2.
If you still find outdated information, please open an issue.
Singletons (Autoload)
Введение
Система сцен Godot, будучи мощной и гибкой, имеет недостаток: отсутствует способ хранения информации (например, счет игрока или инвентарь), которая необходима для нескольких сцен.
Можно решить эту проблему с помощью некоторых обходных путей, но у них есть свои ограничения:
Вы можете использовать "мастер-сцену", которая загружает и выгружает другие сцены в качестве своих детей. Однако это означает, что вы больше не можете запускать эти сцены по отдельности и ожидать от них корректной работы.
Информация может храниться на диске в
user://, а затем загружаться сценами, которые требуют этого, но увы сохранение и загрузка данных часто является громоздкой и может быть медленной.
Шаблон Singleton - полезный инструмент для решения распространенного варианта использования, когда вам необходимо хранить постоянную информацию между сценами. В нашем случае можно повторно использовать одну и ту же сцену или класс для нескольких синглтонов, если они имеют разные имена.
Используя эту концепцию, вы можете создавать объекты, которые:
Всегда загружаются, независимо от того, какая сцена в данный момент запущена.
Могут хранить глобальные переменные, такие как информация об игроке.
Могут обрабатывать переключения между сценами и переходы между сценами.
Действуют как синглтон, так как GDScript не поддерживает глобальные переменные по дизайну.
Узлы и скрипты автоматической загрузки могут дать нам эти характеристики.
Примечание
Godot won't make an Autoload a "true" singleton as per the singleton design pattern. It may still be instanced more than once by the user if desired.
Совет
If you're creating an autoload as part of an editor plugin, consider registering it automatically in the Project Settings when the plugin is enabled.
Autoload
You can create an Autoload to load a scene or a script that inherits from Node.
Примечание
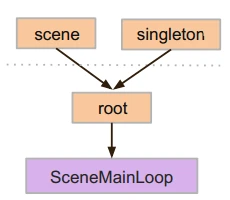
При автозагрузке скрипта будет создан Node, и скрипт будет прикреплен к нему. Этот узел будет добавлен к корневому окну просмотра перед загрузкой любых других сцен.
To autoload a scene or script, select Project > Project Settings from the menu and switch to the Autoload tab.
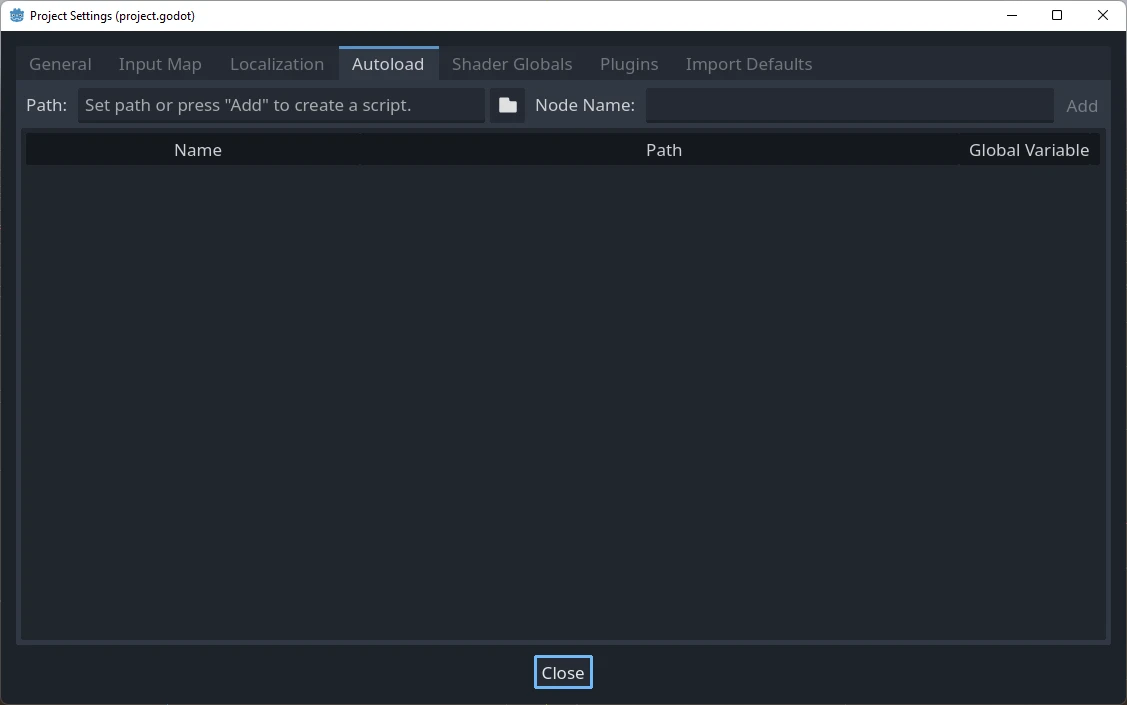
Here you can add any number of scenes or scripts. Each entry in the list
requires a name, which is assigned as the node's name property. The order of
the entries as they are added to the global scene tree can be manipulated using
the up/down arrow keys. Like regular scenes, the engine will read these nodes
in top-to-bottom order.

Это означает, что любой узел может получить доступ к синглтону с именем "PlayerVariables":
var player_vars = get_node("/root/PlayerVariables")
player_vars.health -= 10
var playerVariables = GetNode<PlayerVariables>("/root/PlayerVariables");
playerVariables.Health -= 10; // Instance field.
If the Enable column is checked (which is the default), then the singleton can
be accessed directly in GDScript, without requiring get_node():
PlayerVariables.health -= 10
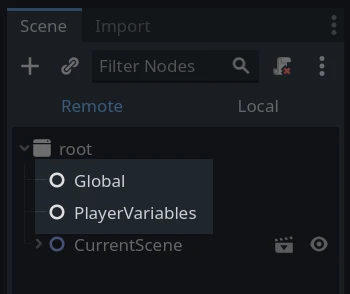
Обратите внимание, что доступ к объектам автозагрузки (скриптам и/или сценам) осуществляется так же, как и к любому другому узлу дерева сцен. На самом деле, если вы посмотрите на дерево выполняющихся сцен, вы увидите, что появились узлы автозагрузки:
Предупреждение
Autoloads must not be removed using free() or queue_free() at
runtime, or the engine will crash.
Пользовательский переключатель сцены
This tutorial will demonstrate building a scene switcher using autoloads. For basic scene switching, you can use the SceneTree.change_scene_to_file() method (see Дерево сцены for details). However, if you need more complex behavior when changing scenes, this method provides more functionality.
To begin, download the template from here: singleton_autoload_starter.zip and open it in Godot.
The project contains two scenes: scene_1.tscn and scene_2.tscn. Each
scene contains a label displaying the scene name and a button with its
pressed() signal connected. When you run the project, it starts in
scene_1.tscn. However, pressing the button does nothing.
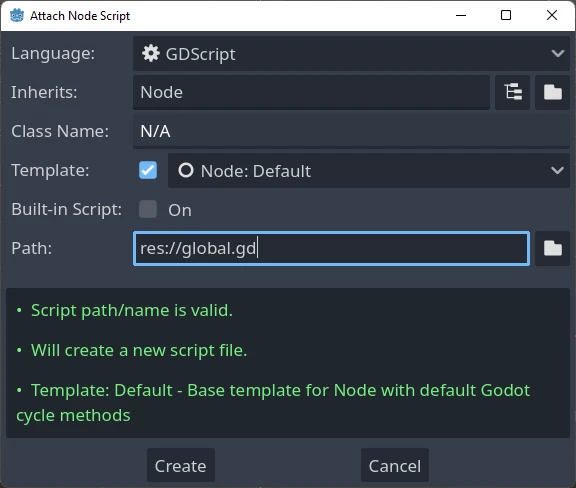
Creating the script
Open the Script window and create a new script called global.gd.
Make sure it inherits from Node:
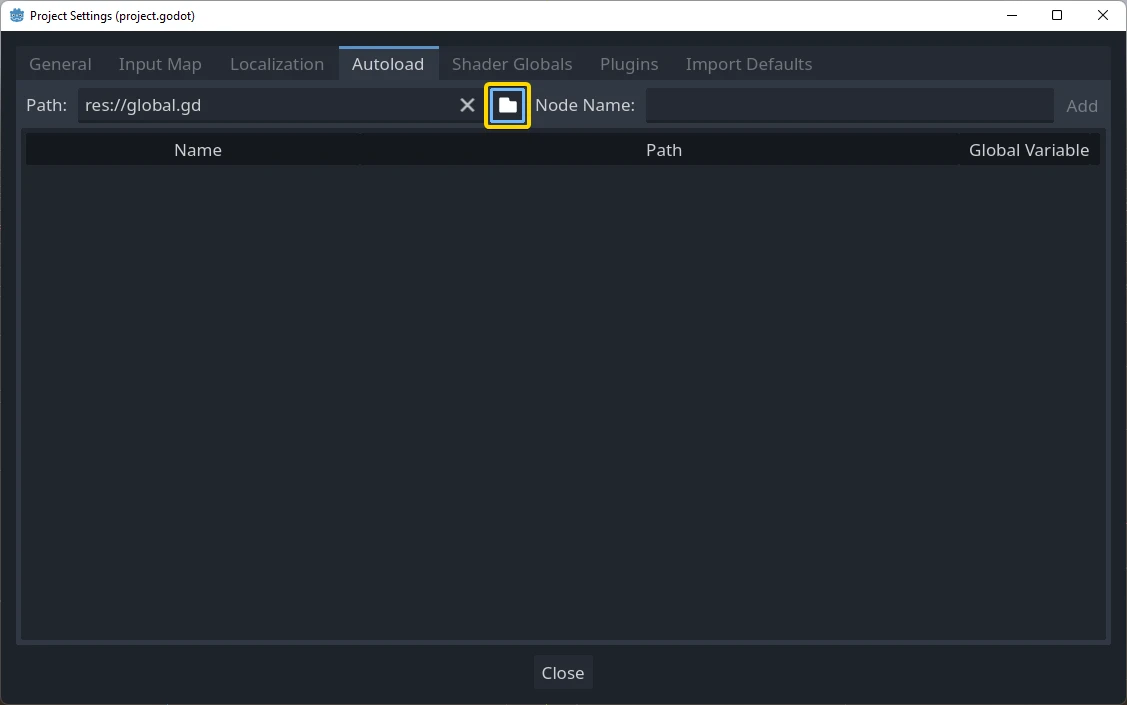
The next step is to add this script to the autoLoad list. Open
Project > Project Settings from the menu, switch to the Autoload tab and
select the script by clicking the browse button or typing its path:
res://global.gd. Press Add to add it to the autoload list:
Теперь всякий раз, когда мы запускаем какую-либо сцену в проекте, этот скрипт всегда будет загружен.
Returning to the script, it needs to fetch the current scene in the
_ready() function. Both the current scene (the one with the button) and
global.gd are children of root, but autoloaded nodes are always first. This
means that the last child of root is always the loaded scene.
extends Node

var current_scene = null

func _ready():
    var root = get_tree().root
    current_scene = root.get_child(root.get_child_count() - 1)
using Godot;

public partial class Global : Node
{
    public Node CurrentScene { get; set; }

    public override void _Ready()
    {
        Viewport root = GetTree().Root;
        CurrentScene = root.GetChild(root.GetChildCount() - 1);
    }
}
Теперь нам нужна функция для смены сцены. Эта функция должна освободить (очистить) текущую сцену и заменить ее на нужную нам.
func goto_scene(path):
    # This function will usually be called from a signal callback,
    # or some other function in the current scene.
    # Deleting the current scene at this point is
    # a bad idea, because it may still be executing code.
    # This will result in a crash or unexpected behavior.

    # The solution is to defer the load to a later time, when
    # we can be sure that no code from the current scene is running:

    call_deferred("_deferred_goto_scene", path)


func _deferred_goto_scene(path):
    # It is now safe to remove the current scene.
    current_scene.free()

    # Load the new scene.
    var s = ResourceLoader.load(path)

    # Instance the new scene.
    current_scene = s.instantiate()

    # Add it to the active scene, as child of root.
    get_tree().root.add_child(current_scene)

    # Optionally, to make it compatible with the SceneTree.change_scene_to_file() API.
    get_tree().current_scene = current_scene
public void GotoScene(string path)
{
    // This function will usually be called from a signal callback,
    // or some other function from the current scene.
    // Deleting the current scene at this point is
    // a bad idea, because it may still be executing code.
    // This will result in a crash or unexpected behavior.

    // The solution is to defer the load to a later time, when
    // we can be sure that no code from the current scene is running:

    CallDeferred(MethodName.DeferredGotoScene, path);
}

public void DeferredGotoScene(string path)
{
    // It is now safe to remove the current scene.
    CurrentScene.Free();

    // Load a new scene.
    var nextScene = GD.Load<PackedScene>(path);

    // Instance the new scene.
    CurrentScene = nextScene.Instantiate();

    // Add it to the active scene, as child of root.
    GetTree().Root.AddChild(CurrentScene);

    // Optionally, to make it compatible with the SceneTree.change_scene_to_file() API.
    GetTree().CurrentScene = CurrentScene;
}
Используя Object.call_deferred(), вторая функция будет запускаться только после завершения всего кода из текущей сцены. Таким образом, текущая сцена не будет удалена, пока она все еще используется (то есть ее код все еще выполняется).
Наконец, нам нужно заполнить пустые функции обратного вызова в двух сценах:
# Add to 'scene_1.gd'.

func _on_button_pressed():
    Global.goto_scene("res://scene_2.tscn")
// Add to 'Scene1.cs'.

private void OnButtonPressed()
{
    var global = GetNode<Global>("/root/Global");
    global.GotoScene("res://Scene2.tscn");
}
и
# Add to 'scene_2.gd'.

func _on_button_pressed():
    Global.goto_scene("res://scene_1.tscn")
// Add to 'Scene2.cs'.

private void OnButtonPressed()
{
    var global = GetNode<Global>("/root/Global");
    global.GotoScene("res://Scene1.tscn");
}
Запустите проект и проверьте, что вы можете переключаться между сценами, нажав кнопку.
Примечание
Когда сцены маленькие, переход происходит мгновенно. Однако, если ваши сцены более сложные, для их отображения может потребоваться значительное время. Чтобы узнать, как с этим справиться, см. следующий учебник: Фоновая загрузка.
В качестве альтернативы, если время загрузки относительно невелико (менее 3 секунд или около того), вы можете отобразить "табличку загрузки", показав какой-либо 2D-элемент непосредственно перед изменением сцены. Затем вы можете скрыть его сразу после изменения сцены. Это можно использовать, чтобы указать игроку, что сцена загружается.