Attention: Here be dragons
This is the latest
(unstable) version of this documentation, which may document features
not available in or compatible with released stable versions of Godot.
Checking the stable version of the documentation...
Спавн монстров
В этой части мы будем порождать монстров по пути случайным образом. К концу у вас будут монстры, бродящие по игровому полю.
Дважды щёлкните на main.tscn в панели FileSystem, чтобы открыть сцену Main.
Прежде чем рисовать путь, мы изменим разрешение игры. Наша игра имеет размер окна по умолчанию 1152x648. Мы установим его на 720x540.
Перейдите в Project -> Project Settings.

Если у вас все еще открыт Input Map (Список действий), переключитесь на вкладку General.
В левом меню перейдите вниз к Display -> Window. Справа установите значение Viewport Width (Ширина) на 720 и значение Viewport Height (Высота) на 540.

Создание пути спавна
Как и в учебнике по 2D-играм, вы собираетесь спроектировать путь и использовать узел PathFollow3D для выборки случайных мест на нём.
Однако в 3D рисовать путь немного сложнее. Мы хотим, чтобы он был вокруг игрового вида, чтобы монстры появлялись прямо за экраном. Но если мы нарисуем путь, мы не увидим его при предварительном просмотре камеры.
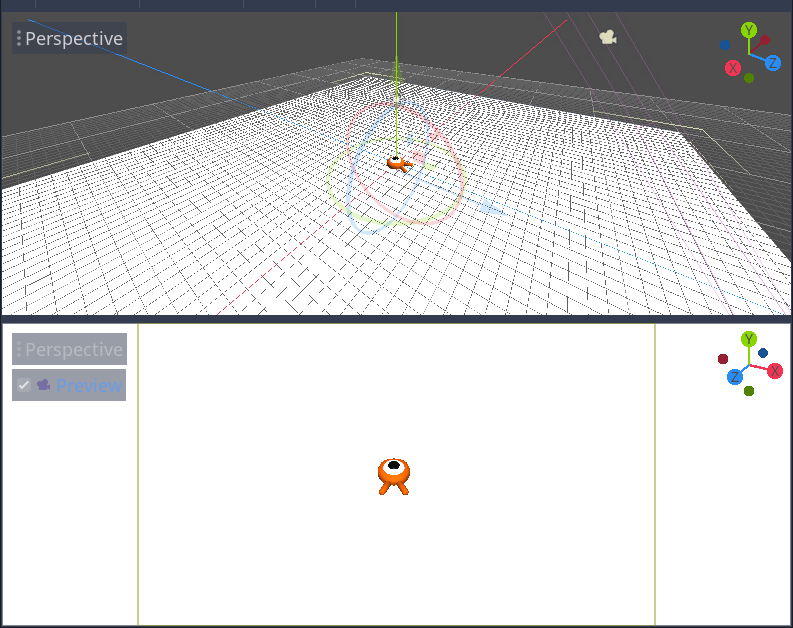
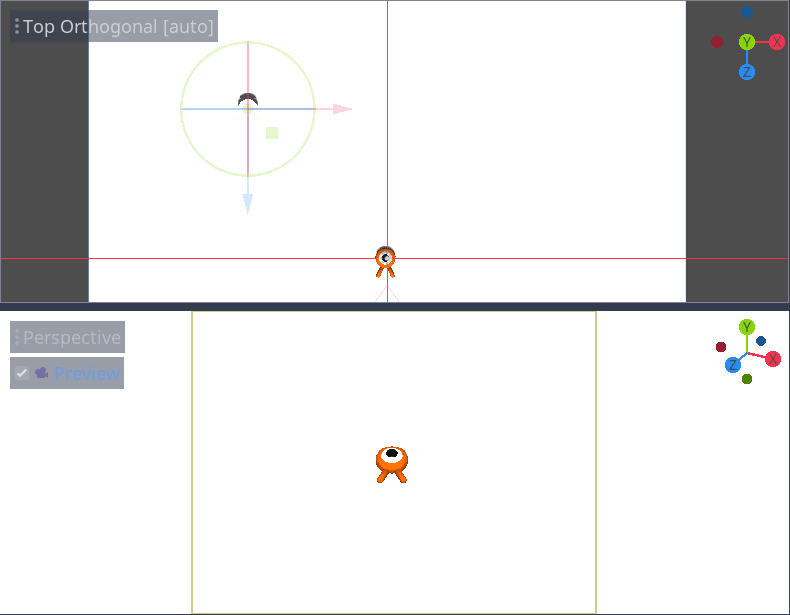
Чтобы определить границы вида, мы можем использовать некоторые 3D-модели. Ваш экран всё ещё должен быть разделён на две части, с предварительным просмотром камеры в нижней части. Если это не так, нажмите Ctrl + 2 (Cmd + 2 на macOS), чтобы разделить вид на две части. Выберите узел Camera3D и установите флажок Preview в нижнем окне просмотра.
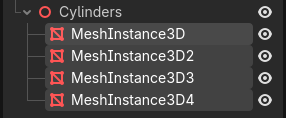
Добавление цилиндров-заполнителей
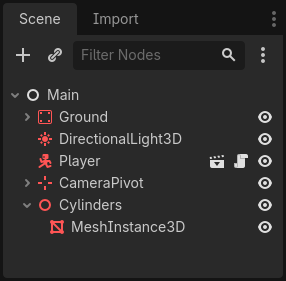
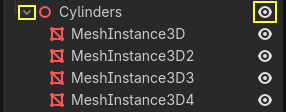
Давайте добавим 3D моделей-заполнителей. Добавьте новый узел Node3D в качестве дочернего узла Main и назовите его Cylinders. Мы будем использовать его для группировки цилиндров. Выберите Cylinders и добавьте дочерний узел MeshInstance3D
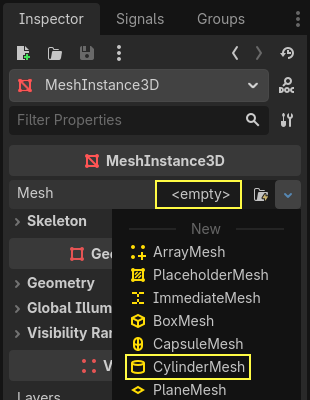
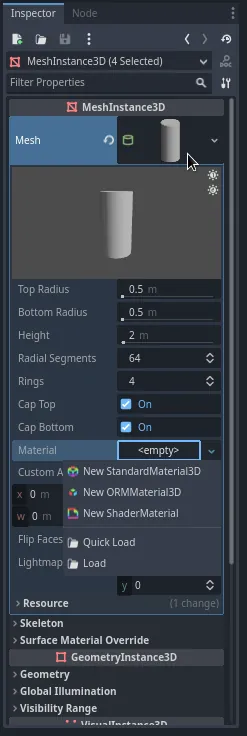
В Inspector назначьте CylinderMesh свойству Mesh.
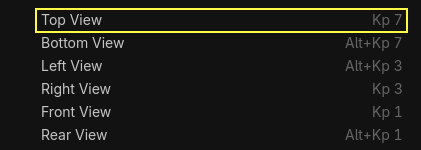
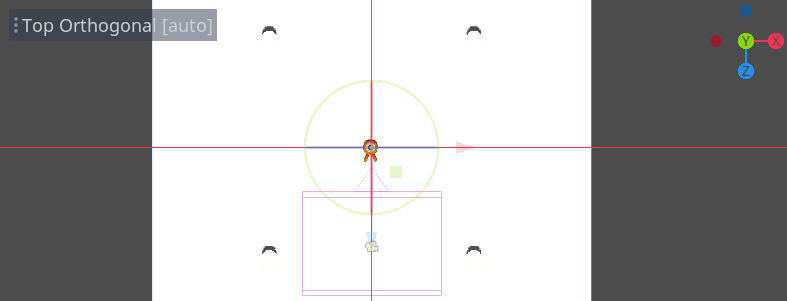
Установите верхний экран на ортогональный вид сверху с помощью меню в левом верхнем углу экрана. Также можете нажать клавишу 7 на клавиатуре.
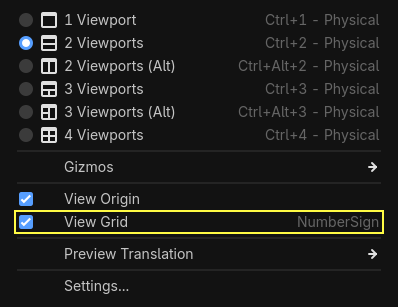
Сетка немного отвлекает. Вы можете переключить её, перейдя в меню View на панели инструментов и выбрав View Grid.
Теперь нужно переместить цилиндр вдоль плоскости земли, глядя на предварительный просмотр камеры в нижнем окне просмотра. Я рекомендую использовать для этого привязку к сетке. Её можно переключить, нажав на значок магнита на панели инструментов или нажав Y.

Поместите цилиндр так, чтобы он находился прямо за пределами обзора камеры в левом верхнем углу.
Мы собираемся создать копии 3D модели и разместить их вокруг игровой области. Нажмите Ctrl + D (Cmd + D на macOS), чтобы продублировать узел. Вы также можете щёлкнуть узел правой кнопкой мыши в панели Scene и выбрать Duplicate. Переместите копию вниз вдоль синей оси Z, пока она не окажется прямо за пределами предварительного окна просмотра камеры.
Выберите оба цилиндра, зажимая клавишу Shift и щелкая по невыбранному цилиндру и продублируйте их.
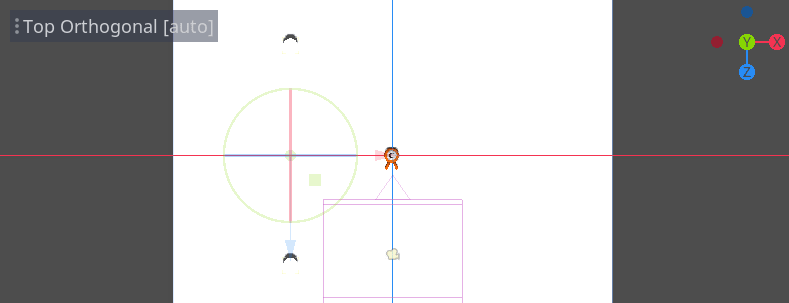
Переместите их вправо, перетащив красную ось X.
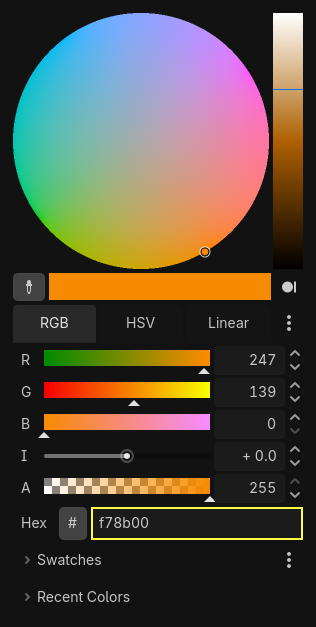
Их немного трудно разглядеть в белом цвете, не так ли? Давайте выделим их, придав им новый материал.
В 3D, материалы определяют визуальные свойства поверхности, такие как цвет, отражение света и многое другое. Мы можем использовать их для изменения цвета 3D модели.
Мы можем обновить все четыре цилиндра одновременно. Выберите все экземпляры 3D модели в панели Сцена. Для этого щёлкните на первом из них и щёлкните с зажатым Shift на последнем.
В инспекторе, раскройте раздел Material и назначьте StandardMaterial3D в слот 0.
Щёлкните на иконку сферы, чтобы открыть ресурс материала. Вы получите предварительный просмотр материала и длинный список разделов, заполненных свойствами. С их помощью можно создавать всевозможные поверхности, от металла до камня или воды.
Расширьте раздел Albedo.
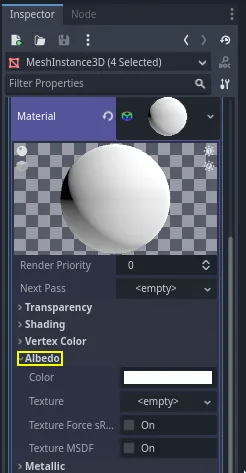
Установите цвет, контрастирующий с фоном, например, ярко-оранжевый.
Теперь мы можем использовать цилиндры в качестве ориентиров. Сложите их в панели Сцена, нажав на серую стрелку рядом с ними. Продвигаясь вперёд, вы также можете переключить их видимость, нажав на значок глаза рядом с Cylinders.
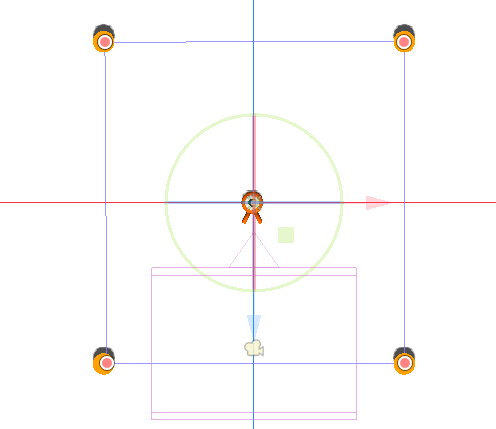
Добавьте узел Path3D в качестве дочернего узла Main. На панели инструментов появятся четыре иконки. Щёлкните инструмент Add Point (Добавить точку(в пустом пространстве)) - иконку с зелёным знаком "+".

Примечание
Наведя курсор на любую иконку, можно увидеть всплывающую подсказку с описанием инструмента.
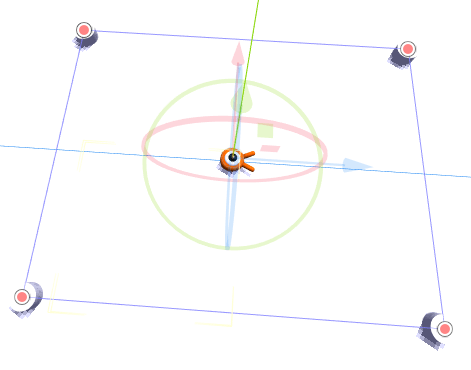
Щёлкните в центре каждого цилиндра, чтобы создать точку. Затем нажмите на иконку Close Curve (Замкнуть кривую) на панели инструментов, чтобы замкнуть контур. Если какая-либо точка немного смещена, можно щёлкнуть и перетащить её, чтобы изменить положение.

Ваш путь должен выглядеть следующим образом.
Для выборки случайных позиций на нём нам нужен узел PathFollow3D. Добавьте узел PathFollow3D в качестве дочернего узла Path3D. Переименуйте эти два узла в SpawnPath и SpawnLocation соответственно. Это более точно описывает то, для чего мы будем их использовать.

После этого мы готовы к написанию кода механизма порождения.
Случайный спавн монстров
Щелкните правой кнопкой мыши на узле Main и прикрепите к нему новый скрипт.
Сначала мы экспортируем переменную в инспекторе, чтобы мы могли присвоить ей mob.tscn или любого другого монстра.
extends Node

@export var mob_scene: PackedScene
using Godot;

public partial class Main : Node
{
    // Don't forget to rebuild the project so the editor knows about the new export variable.

    [Export]
    public PackedScene MobScene { get; set; }
}
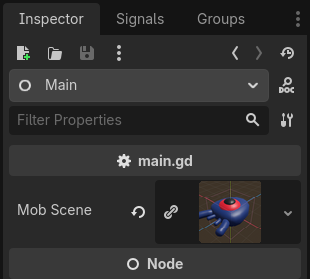
Мы хотим, чтобы мобы появлялись через регулярные промежутки времени. Для этого нам нужно вернуться к сцене и добавить таймер. Но перед этим нам нужно назначить файл mob.tscn свойству mob_scene (в противном случае это null)
Вернитесь на 3D-экран и выберите узел Main. Перетащите mob.tscn из панели Файловая система в слот Mob Scene в инспекторе.
Добавьте новый узел Timer как дочерний узел Main. Назовите его MobTimer.

В инспекторе установите Wait Time на 0.5 секунд и включите Autostart, чтобы он автоматически запускался, при запуске игры.
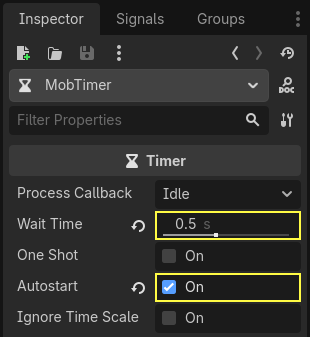
Таймеры издают сигнал timeout каждый раз, когда они достигают конца своего времени ожидания (Wait Time). По умолчанию они перезапускаются автоматически, испуская сигнал в цикле. Мы можем подключиться к этому сигналу из узла Main, чтобы порождать монстров каждые 0.5 секунды.
Не выбирая MobTimer, перейдите в панель Signals справа и дважды щелкните сигнал timeout.
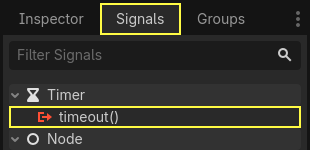
Подключите его к узлу Main.
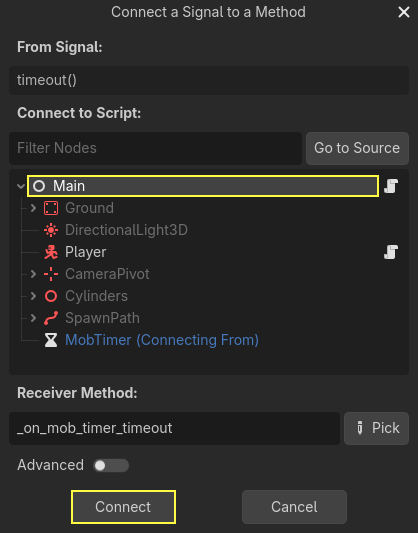
Это вернёт вас к скрипту с новой пустой функцией _on_mob_timer_timeout().
Давайте напишем логику порождения мобов. Мы собираемся:
Инстанцировать сцену mob.
Выбирать случайную позицию на пути порождения.
Получать позицию игрока.
Вызывать метод
initialize()моба, передав ему случайную позицию и позицию игрока.Добавьте сцену mob в качестве дочернего элемента узла Main.
func _on_mob_timer_timeout():
    # Create a new instance of the Mob scene.
    var mob = mob_scene.instantiate()

    # Choose a random location on the SpawnPath.
    # We store the reference to the SpawnLocation node.
    var mob_spawn_location = get_node("SpawnPath/SpawnLocation")
    # And give it a random offset.
    mob_spawn_location.progress_ratio = randf()

    var player_position = $Player.position
    mob.initialize(mob_spawn_location.position, player_position)

    # Spawn the mob by adding it to the Main scene.
    add_child(mob)
// We also specified this function name in PascalCase in the editor's connection window.
private void OnMobTimerTimeout()
{
    // Create a new instance of the Mob scene.
    Mob mob = MobScene.Instantiate<Mob>();

    // Choose a random location on the SpawnPath.
    // We store the reference to the SpawnLocation node.
    var mobSpawnLocation = GetNode<PathFollow3D>("SpawnPath/SpawnLocation");
    // And give it a random offset.
    mobSpawnLocation.ProgressRatio = GD.Randf();

    Vector3 playerPosition = GetNode<Player>("Player").Position;
    mob.Initialize(mobSpawnLocation.Position, playerPosition);

    // Spawn the mob by adding it to the Main scene.
    AddChild(mob);
}
Выше randf() выдает случайное значение между 0 и 1, что и ожидает progress_ratio узла PathFollow: 0 - начало пути, 1 - конец пути. Путь, который мы задали, проходит вокруг области обзора камеры, поэтому любое случайное значение между 0 и 1 - это случайная позиция вдоль краев области обзора!
Обратите внимание, что если вы удалите Player из основной сцены, следующая строка
var player_position = $Player.position
Vector3 playerPosition = GetNode<Player>("Player").Position;
выдаст ошибку, потому, что $Player не существует!
Вот, для справки, полный скрипт main.gd.
extends Node

@export var mob_scene: PackedScene


func _on_mob_timer_timeout():
    # Create a new instance of the Mob scene.
    var mob = mob_scene.instantiate()

    # Choose a random location on the SpawnPath.
    # We store the reference to the SpawnLocation node.
    var mob_spawn_location = get_node("SpawnPath/SpawnLocation")
    # And give it a random offset.
    mob_spawn_location.progress_ratio = randf()

    var player_position = $Player.position
    mob.initialize(mob_spawn_location.position, player_position)

    # Spawn the mob by adding it to the Main scene.
    add_child(mob)
using Godot;

public partial class Main : Node
{
    [Export]
    public PackedScene MobScene { get; set; }

    private void OnMobTimerTimeout()
    {
        // Create a new instance of the Mob scene.
        Mob mob = MobScene.Instantiate<Mob>();

        // Choose a random location on the SpawnPath.
        // We store the reference to the SpawnLocation node.
        var mobSpawnLocation = GetNode<PathFollow3D>("SpawnPath/SpawnLocation");
        // And give it a random offset.
        mobSpawnLocation.ProgressRatio = GD.Randf();

        Vector3 playerPosition = GetNode<Player>("Player").Position;
        mob.Initialize(mobSpawnLocation.Position, playerPosition);

        // Spawn the mob by adding it to the Main scene.
        AddChild(mob);
    }
}
Вы можете протестировать сцену, нажав F6`(:kbd:`Cmd + R в macOS). Вы должны увидеть, что монстры появляются и движутся по прямой линии.
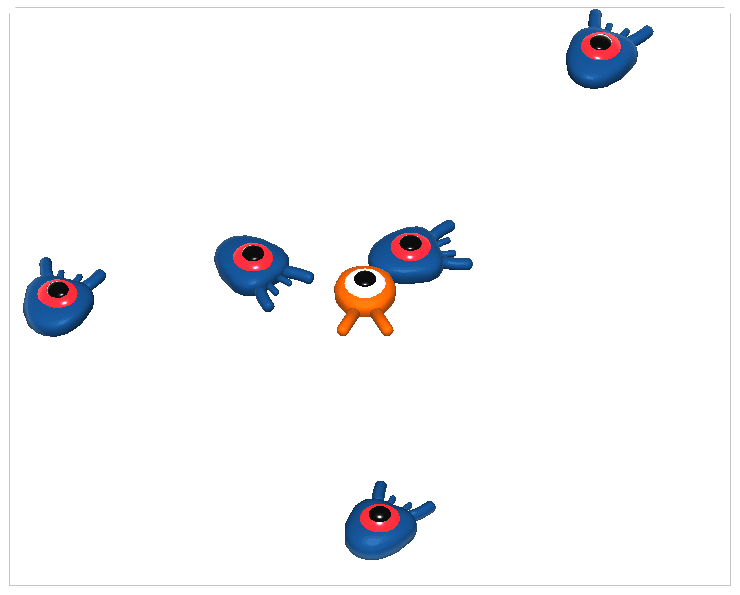
Пока что они сталкиваются и скользят друг по другу, когда их пути пересекаются. Мы рассмотрим это в следующей части.